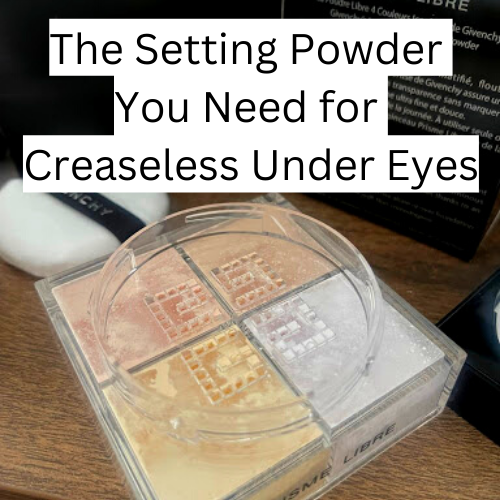
The Setting Powder You Need for Creaseless Under Eyes.
I’m sure you’ve heard about it over and over…The Givenchy Prisme Libre Loose Powder.
But is it worth the hype? Do you really need it? I will tell you my experience as someone who has been self-conscious of her under eyes since 5th grade
I finally got my hands on it after major back & forth whether it would be worth it, and then when I had previously ordered it from Sephora via local delivery, it was stolen before I could even try it. So I figured I didn’t need it and Sephora was kind enough to give me my money back.
But months later I still kept hearing about it, and of course, I want the best products for my clients arsenal so I decided to take the plunge for the $58 powder.
It’s not that the price point is so high for a cosmetic item.
BUT for a typical setting powder, yes absolutely it’s high.
However, whatever magic bean stock was chopped down and ground into this extremely finely milled powder is worth every cent.
Why I love it:
-it actually helped my Crow’s Feet from creasing. I tried it with several concealers (because I’m always looking for the next best concealer) and I found one of the best pairings to be with the Nars Creamy Radiant Concealer.
-Although no matter which concealer I used, I had significantly less creasing than if I went without.
A lot of factors go into this answer so here are some questions to ask yourself right now:
Do you currently have box dye in your hair?
Do you have a demi/semi-permanent hair color currently?
Do you want to make a drastic change to your hair?
Is your hair temperamental?
Are you unsure of what you want?
Are you nervous about how your new hair color would look?
The more times you answer “YES” the earlier you should start planning for your wedding hair color because typical hair color appointments are every 4-8 weeks. That means the more work that needs to happen to your hair to achieve your dreamy bridal hair look, the sooner you should start.
A quick way to figure out when to start is to have a consult with your current or new hairdresser.
If you don’t have one, look for one on Instagram or Yelp that specializes in whatever you want or currently have.
From there your hairdresser will give you an idea of what needs to happen.
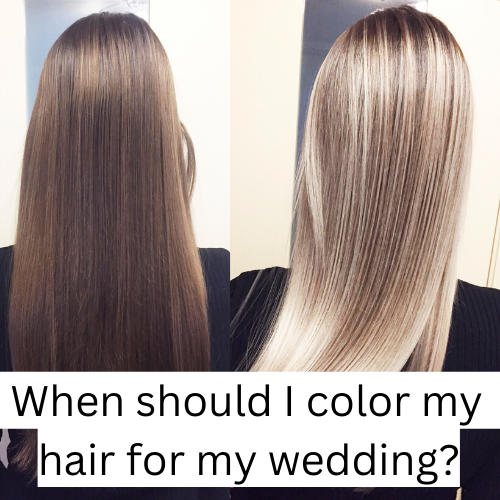
Personally, since I’m a platinum blonde and envision myself having a more timeless blonde color for my wedding, we have started playing around with Root Melts and different toners.
But soon we will need to decide if I want low lights to bring in more depth all over. I also got a trim so I can avoid split ends from giving my hair a dehydrated look.
I’ll keep you posted on my hair journey on my Instagram!
HOT TIP:Book all of your hair appointments upfront. I recommend having your last hair cut at least 4-6 weeks out from your wedding day and your last hair color to be 2 weeks out (if you have noticeably gray hairs I would do it at about 1 week out).
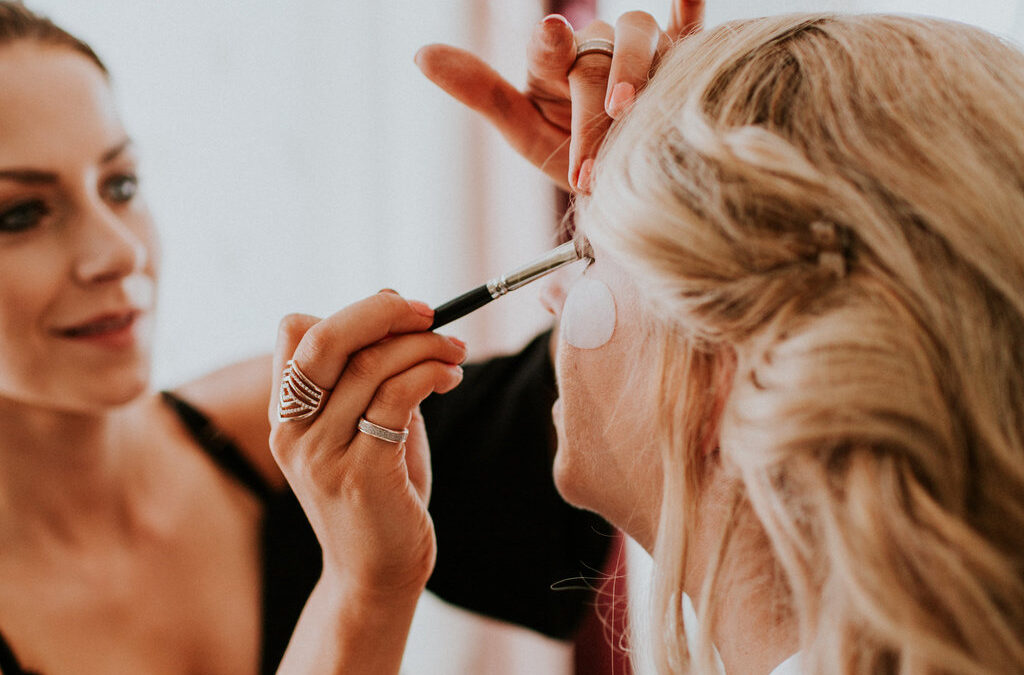
I am writing this post for the bride who had to cancel or postpone her grand wedding because of the global pandemic and is either having an elopement style ceremony or simply just having a nice night with her new hubby after signing a marriage certificate. My heart aches for you and so I want to gift you a bridal makeup tutorial you can do at home. I have seen some brides still have professional photographers come and I know how pricey those photos are and want you to feel like you still look your best even without a professional makeup artist, physically, by your side.
More than just a makeup tutorial…
Now, this isn’t an ordinary makeup tutorial. This is basically a walkthrough for you on how to make your makeup application for your intimate ceremony a real treat! I’m bringing the Chelsea Rose Beauty into your home, virtually! Make sure to follow me on IG and catch the actual video on IGTV. For those of you that are not on Instagram you can actually download the video here. Okay, so you’ll need a few key ingredients to get yourself bridal ready:
Put on your bridal robe
Get in front of some natural lighting
Bring over your makeup stash
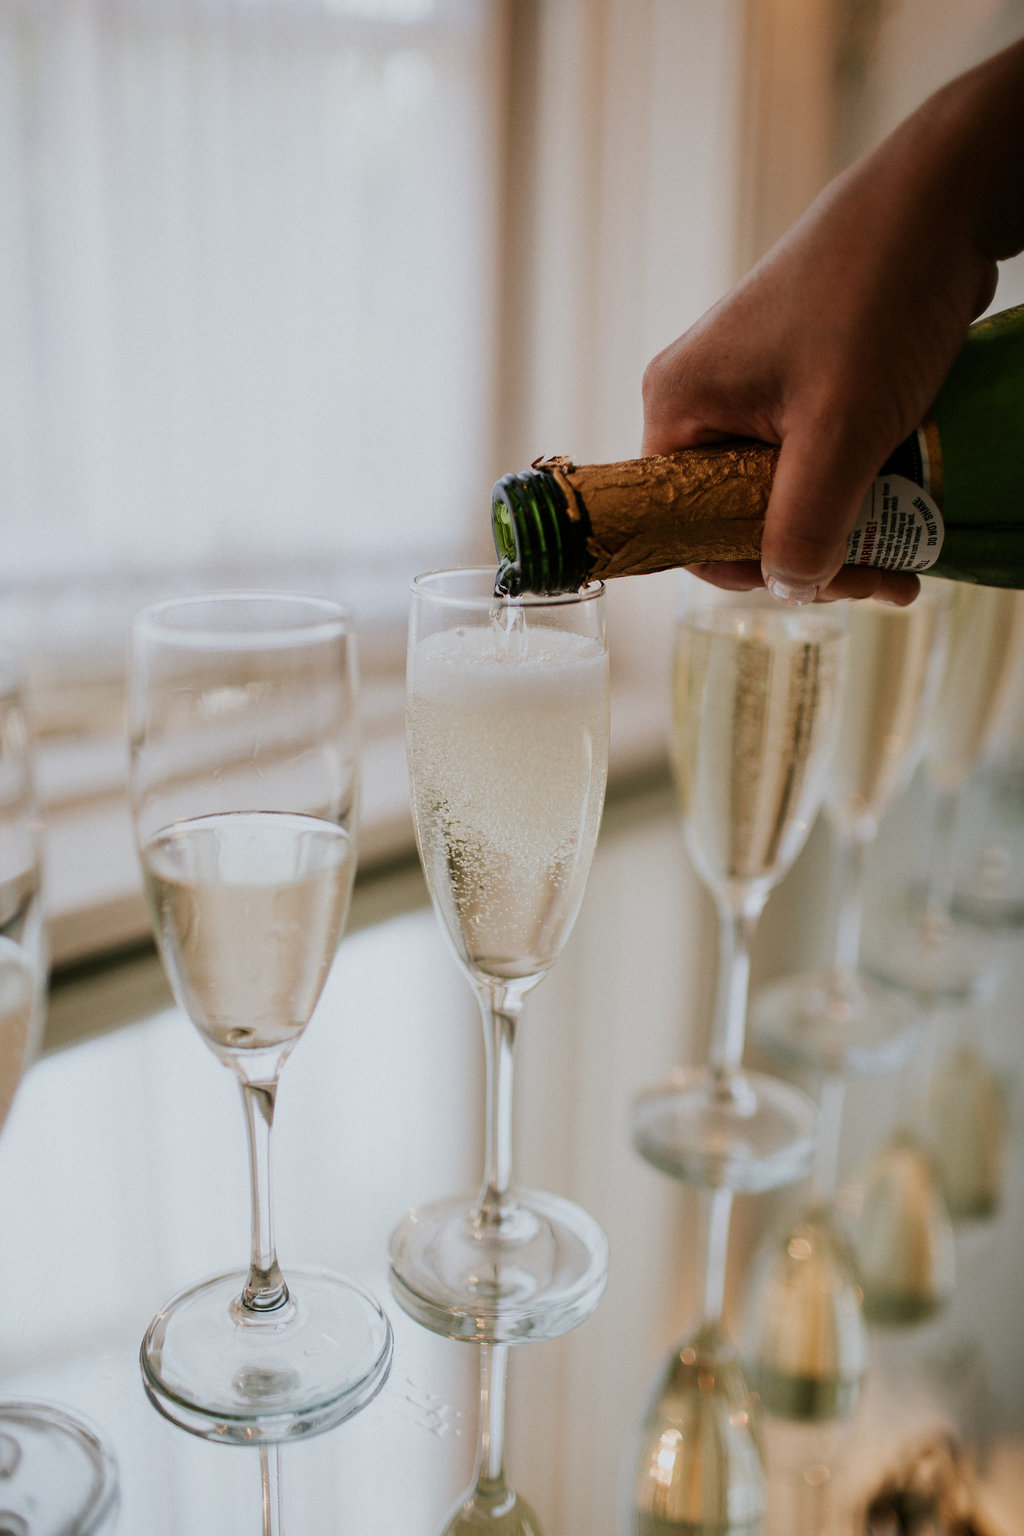
And pour yourself a glass of champagne!
The products I used that will be helpful to you
I’m not usually one for listing out products only because I think the skill is more important. However, for this video I think it’s necessary so you can get a good visual since we aren’t in person. So the products I am using for this are:
Sonia Roselli Beauty Water Elixir and Water Blam – hydrate that skin girl! The elixir is my all time favorite, especially paired with the water balm, which has a built in makeup primer.
MAC Paint Pot in Bare Study – this is acting as my eyeshadow primer (you don’t want to crease!) and also is beautiful as a pop of champagne shimmer if you want to keep it real simple
IT Cosmetics CC+ Cream – not only do I love this on a day-to-day but it also can provide you enough coverage for camera AND has sunscreen in it!
IT Cosmetics Bye Bye Under Eye – I prefer the one without the shimmer! Color Medium is my favorite because of the pink undertone to camouflage bluish or brown tone under eyes.
Senna Cosmetics Cream & Powder Blush & Eyeshadows – One of my biggest tips for makeup application is to apply a cream blush and then a powder on top. It may seem a bit much but blush is always the first thing to blend too much into the skin.
L’oreal Paris Voluminous Lash Primer – This stuff is a must-have! It help boost your lashes enough to forgo false lashes and help the mascara stay on longer. It is white looking so definitely finish with your favorite mascara (probably waterproof!)
Your favorite lipstick! I actually chose to forgo lipstick and opted for Tarte Jelly Lip Glaze in Strawberry because it’s not only super moisturizing, it’s also a very pretty shade of pink. I just lined my lips with a matching shade of lip liner to make sure my baby lips would show up just enough for camera.
Application
Skin prep is so important to a good makeup application. Proper skin prep can help your application last longer and improve the texture! For more on skincare, check out my video with Christiana of Brave Beauty Spa here. Also, I LOVE pampering masks, so I did 24K Gold under eye masks to help me from creasing by adding moisture.
I prefer to start with the eye makeup before doing foundation so I go in within the eyeshadow primer all over the lid and buff it out. I always start with a highlighting shadow on the brow bone and inner corner of the eye. From there I take a medium shade of whichever tones you are working with (I am using warm shades). BLEND ‘TIL YOU’RE BORED! Next, I added in a super shimmery wet pigment from MAC and blended it in a tiny bit just enough to make it look seamless. Lastly, I absolutely love to add a light-medium shade with a small tapered brush to go underneath my bottom lash. I also like to and a little bit of the medium shade on the bottom outer corner for more depth.
From here I add a black eyeliner on my top waterline and bottom outer corner, on the lash line, not waterline…preference for this look. Then I’ll curl my eyelashes and apply my gel liner on top with a little wing. Next up, add that Loreal Lash primer (the holy grail) with your favorite mascara, top and bottom.
Now we are ready for under eye concealer. I love to have a peachy salmon tint to my concealer because it helps tone down the bluish tint in my dark circles. (I personally prefer one coat under foundation, and one on top, just make sure it is not the very last thing you put on).
Foundation time! I personally love to use my hands for my face foundation because the warmth helps it melt into the skin really nicely but I do like to bring it down to the neck with a flat face blending brush. Next up, add in that cream blush. You can even do this underneath the foundation if you want it super soft. Still top with a powder blush for longevity.
Bronzer! Feel free to skip this step if this is not your thing. For those that love it, go ham. Just make sure it is blended nicely. If you over do it, you can blend it with a finishing powder. I also love to apply bronzer on my big forehead so it appears smaller! Same with the nose! Just make sure you don’t make your nose look red.
My favorite step, eyebrows. I love my The Brow Gal pencil in Taupe. Fill in as desired. A little filling of the brows makes a world of a difference for camera!
Finishing steps: I used the Tarte Lip Glaze on my lips with Makeup Forever lip pencil 1C and added a little highlight on my cheekbones and collarbone! Now if you like your complexion matte, use a setting powder before you use a finishing spray, otherwise, just skip to the spray.
You did it! I hope you really enjoyed this and feel so beautiful and ready for an amazing night (or day) with your fiance!
Please share this with your girlfriends that just want to feel like a princess right now and are stressed from the affects of their wedding being postponed!
Originally, I was going to write about cute date night ideas and presents for your man (or wo-man), and I decided it would be way more fun to tell you about ways to treat yourself this Valentine’s Day!
Okay, first up let me give you the tea on deals that are happening for Valentine’s Day 2020.
Deal Number 1: Personally, my favorite way to treat myself is with skincare or anything spa related. Have you ever heard of Summer Fridays?! They have an amazing skincare line of creams and masks that make your skin glow and brings you the confidence to rock a bare face! This V-Day they are offering 50% OFF & FREE SHIPPING my favorite R + R Mask that exfoliates, hydrates, and smells like a bundle of fresh roses. Your partner is going to sniffing your face all night and your girlfriends are going to be asking you why you’re glowing! To get the deal, enter code: LOVERR
Deal Number 2: Another way I love to treat myself is through healthy foods!! I love a good, juicy hamburger now and again, but I feel at my best when I treat my body to a delicious smoothie or colorful salad. One of my favorite & trusted brands,Tone It Up, is offering 14% OFF the entire site of protein powders and supplements!! The TIU girls are so motivating and I even follow their workouts & meal plan throughout most of the year because of all their delicious & unique meals. My favorites to shop are: the chocolate or vanilla (I’m simple!) protein powders and the pre-workout (it seriously is amazing for focus and no jitters!). To get the deal, enter code: LOVEYA
Deal Number 3: Breathe in. Breathe out…yes YOGA. Girl, you deserve the gift of yoga. Today only, if you go to your local YogaSix studio, you’ll receive a regular class for only $14…yesssss take the time to decompress after a long week of work and do your body some good! To see locations near you & call just to make sure that studio will honor the Instagram deal.
Bonus Deal: This one isn’t a deal but it’s for those that want to give the love. The non-profit Stand Up To Cancer is asking for help raise awareness of their mission to help cancer patients receive therapy more quickly. To do so you take a photo of you and your honey sharing a kiss and post it to social media with the hashtag #KissCancerGoodbye and tag @SU2C
I hope you enjoy these special Valentines offers and pamper yourself! We all could love ourselves a little harder and enjoy a treat now and again!
I do not benefit from you using these links or deals, I just wanted to share my favorites!!
About the author–My name is Chelsea and I’ve served as a makeup artist for nearly a decade. I’ve transformed more faces than I can think of and curled way more heads of hair than I have ever curled my own. If hair & makeup wasn’t a gift bestowed upon me, well by now it is a superpower. I can’t unlearn it and I don’t want to! I love having the skillset to beautify brides and bridesmaids for weddings in San Diego (my main niche) and the special opportunity my brideys give me when I am apart of their special occasion!! You can learn more about me in the About section.
It’s a new year, new decade, and it’s time to step into your best self yet.
This post is not about how to stick to a resolution, it’s about coming to a realization that your life is about to change because you are getting married this year. You are going to become a wife. Your identity is going to shift. I believe awareness is a powerful tool and becoming aware of what’s ahead is helpful to prepare yourself for what’s to come.
Let’s not get overwhelmed with what could happen. Let’s not stress about being overstressed. Let’s learn to accept ourselves when we aren’t on a diet. Let’s learn to love ourselves at every phase of our lives. Let’s finally learn how to care for ourselves before we need to, so that when you are finally married and then maybe start to have kids, that you’ll know how to treat yourself and then take care of others.
Diets– Can we all just recognize that the word ‘diet’ includes the word ‘die’? Maybe a dramatic look on the word, but let’s be real, the word is always followed by a huge, longsigh. So screw it! Words of encouragement: Focus on fueling your body with what you know deep down inside you need first. Girl, if that is a piece of dark chocolate, do it. I think you’ll find that it isn’t that cheesy, stuffed jalapeno wrapped in bacon, but more like a glass of water or well, maybe just a few bites of lemon zested kale first.
Stress– Ah! Such a heavy thing this can be! I can count on all my fingers and toes the times I’ve heard women say they want to learn how to be less stressed. Why? Stress helps you get things done, it helps you fight or flight. Stress tells you when you made a bad decision. Learn from this! Pay attention when stress is kicking in and choose whether it needs to be present or not.
Routine– I am the last person on the planet who can tell you the perfect routine for you because I am routinely trying new routines, pun intended! There are 4 seasons in a year, which probably means, you’ll be in at least 4 different stages of routine per year. The beautiful part of this is that you get to decide what that looks like for you. Some parts of the year I need to be at the gym 5 days a week to manage my stress, and other times I desire yoga and dance for my soul. I am in charge of what my routine looks like and no one can take that from me. Say it with me: No one can take that from me. The best routine for yourself is when you put yourself first.
The Best Version of You– The best for last. The part where you can let your imagination run wild and envision what the best version of you actually looks like. Close your eyes for 5, maybe even 10 minutes if you have it, and visualize what you see when you are post-wedding and the bride bliss starts to slow, and things go back to “normal”. Are you still taking care of yourself even though you aren’t wedding prepping? Write what you see down on paper. This is your starting point. This is where you decide to make a conscious effort to change for more than just the wedding, but for your soon-to-be husband, your dog, your future children, and most importantly your future self. Cheers to future you, girl!
I hope this unconventional post from a bridal artist moves you to not only be a bride in 2020 but a ‘bride for life’. You deserve all the pampering and care in the world, so embrace this!
With love and energy,
Chelsea
About the author–My name is Chelsea and I’ve served as a makeup artist for nearly a decade. I’ve transformed more faces than I can think of and curled way more heads of hair than I have ever curled my own. If hair & makeup wasn’t a gift bestowed upon me, well by now it is a superpower. I can’t unlearn it and I don’t want to! I love having the skillset to beautify brides and bridesmaids for weddings in San Diego (my main niche) and the special opportunity my brideys give me when I am apart of their special occasion!! You can learn more about me in the About section.
This is the official spot to get familiar with me, Chelsea, owner of Chelsea Rose Beauty. It’s a company, but also half of me and my identity.
I’ve served as a makeup artist for nearly a decade. I’ve transformed more faces than I can think of and curled so many hairs, I can tell you how your hair will hold a curl before I even touch it. If hair & makeup wasn’t a gift bestowed upon me, well by now it is a skill set. I can’t unlearn it and I don’t want to! I love having the power to beautify brides and bridesmaids (my main niche) and the special opportunity my brideys give me when I am apart of their special occasion!! You can learn more about me in the About section.
As for this blog, you can expect to learn from me about why I use airbrush makeup, how to feel your best for your wedding day, and much more you should know as a bride! –And hey, even if you are not a bride, you may be able to learn a thing or two about the world of beauty.